Den nye IC9700 lider under dårlig frekvensstabilitet. Årsagen skyldes termisk drift, og problemet forværres når den indbyggede blæser går igang/stopper. Der er formentlig en softwareløsning på problemet. Men innovative amatører har allerede fundet genveje. Har man modet til at lodde i sin nye station, så kan det klares med en simpel zenerdiode, så blæseren konstant kører med 50%. Se vejledningen nedenfor fra kc4ylv.online:
Introduction
The frequency stability of the Icom IC-9700 as originally delivered by Icom, has been found to be rather disappointing. Although the radio has a 10MHz frequency reference input, it (as of firmware V1.06) does not discipline the internal reference oscillator to the external 10MHz frequency, and the frequency of the unit varies significantly during both extended transmit and receive periods (With my unit I am seeing variations of the order of 60-70Hz at 432MHz, and up to 200Hz at 1296MHz).
The fan in the unit does not run while the unit is in receive mode, and this appears to be a cause of significant temperature variations within the transceiver.
A minor modification that allows the fan to run at approximately half speed allows the temperature within the transceiver to remain much more constant and (for my unit) has reduced the frequency variations to typically no more than 4-5Hz during testing.
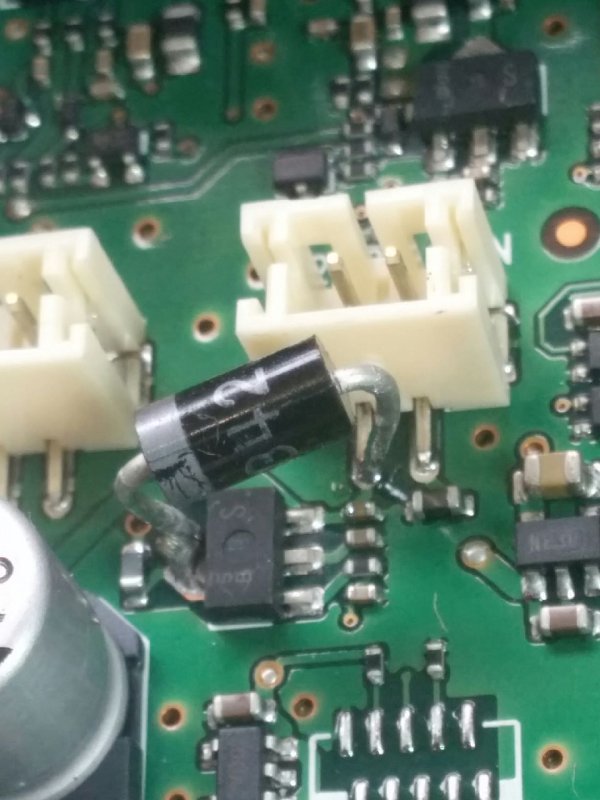
The modification consists of adding a 6.8V Zener diode across the transistor that is used to power the fan.
Required
- 6.8V 5W Zener diode.
Modication
- Remove the carrying handle if fitted.
- Remove the 12 small screws securing the bottom cover to the transceiver N.B. Use a JIS screwdriver to avoid damage to the screw heads).
- Remove the bottom cover.
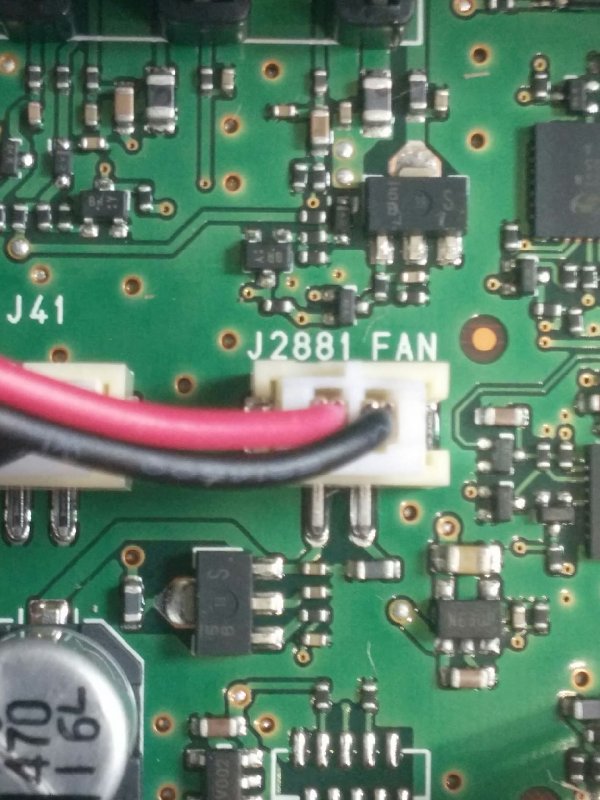
- Locate the fan connector (labelled “J2881 FAN”) towards the rear of the transceiver.

Picture: Before.jpg
- Remove the fan plug to facilitate access.
- Trim and bend the leads of the Zener diode to fit neatly between the tab connection of the transistor, and the pin of the fan socket that the red wire of the fan is connected to.
- Tin the end of the cut leads of the Zener diode.
- Carefully solder the Zener diode into place.

Picture: After.jpg
- Reconnect the fan connecting plug.
- Replace the bottom cover of the transceiver.
- Replace the carrying handle if previously removed.
Hits: 476

